
A field has two boundaries worth knowing: where it stays strong, and where it fades out.
A spec sheet provides one Gauss value, and it's easy to picture that as the entire field. But the field doesn't hold that strength across the entire surface of the accessory and then immediately stop. On a pancake coil, the flat spiral wound into many discs and paddles, it's strongest at the center and fades as you move outward, so it's good to know how far it stays strong and how far any usable field reaches. Two boundaries capture that, and once you know them you can picture the entire field without ever seeing a heatmap.
The first boundary is where the field stays strong.
Move a probe out from the center and the field falls off continuously, so the first thing worth marking is where it's still close to its best. We measure that as the 50% falloff distance, the point where the field has dropped to half of its center peak. Inside that distance the field is at least half as strong as it ever gets, so this boundary marks the width of the strong core, the part of the surface you'd want over the spot you're working on.
The second boundary is where usable field runs out.
Keep moving outward and the field keeps fading, until eventually there's so little left that it no longer counts as coverage. We mark that outer limit at a tenth of the peak, and the distance from the center to it is the effective field radius. Double it and you get the effective field diameter, the full width of the zone the field actually covers. That single figure is the honest measure of how much of the surface delivers usable field, and it's the value to compare across accessories.
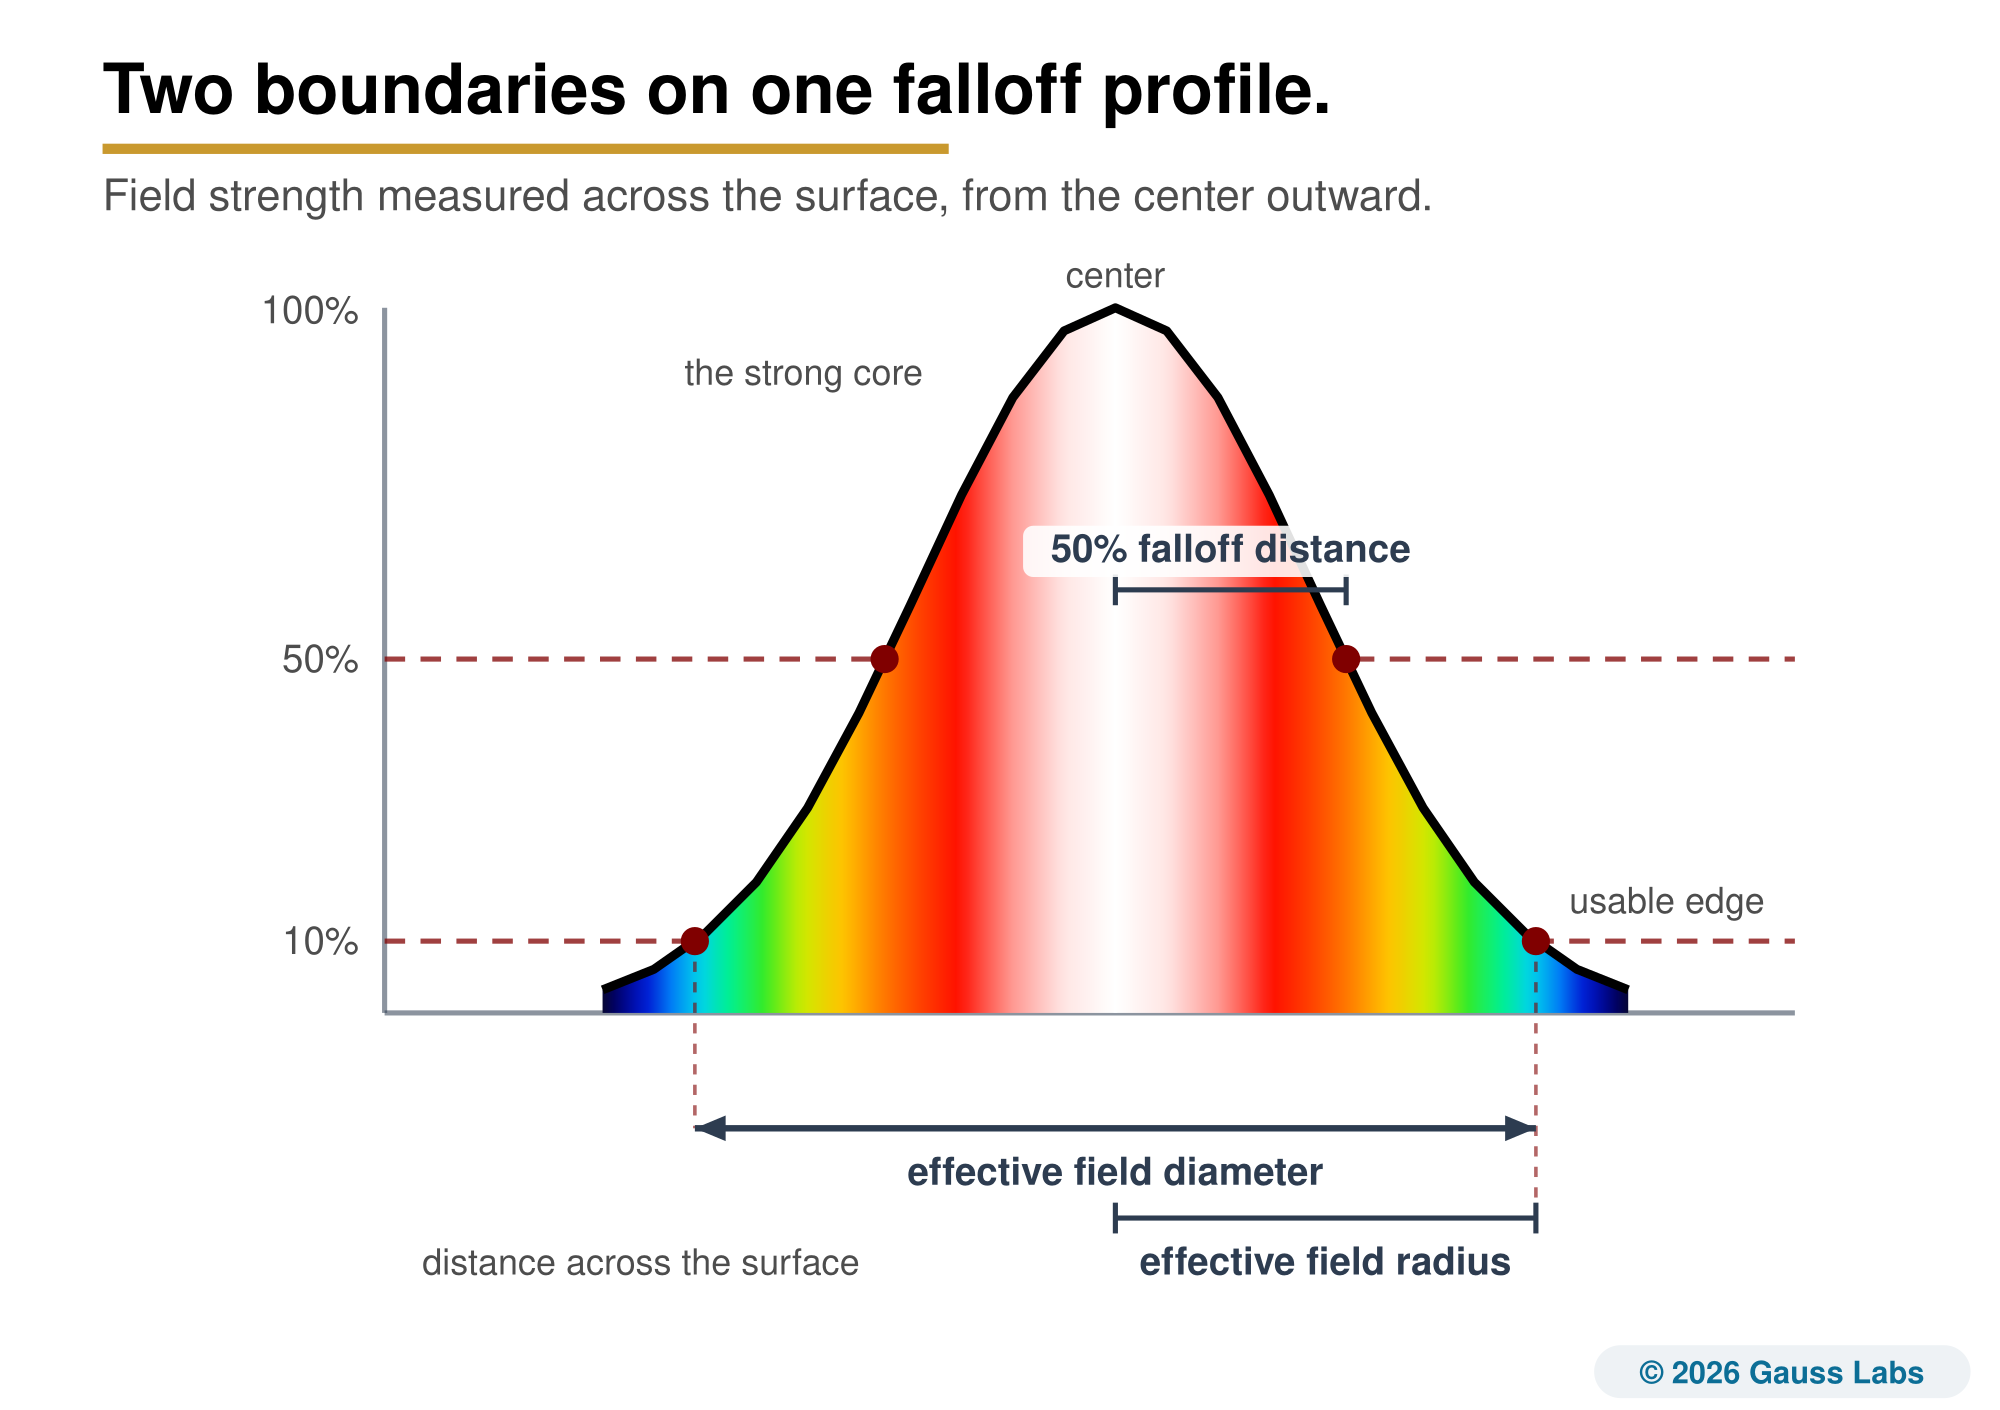
On a real accessory, both boundaries are values we measure.
A measured example makes this concrete. A Sota Instruments Magnetic Pulser Paddle we purchased for in-house testing has a peak of 7,120 G at the center, and its effective field diameter measures about 56mm (2.2 in). So its usable field is a little over two inches across, and the same scan also gives the tighter 50% falloff distance inside that. Even at the 10% edge the field is still around 700 G, real strength, just a small fraction of the center peak.
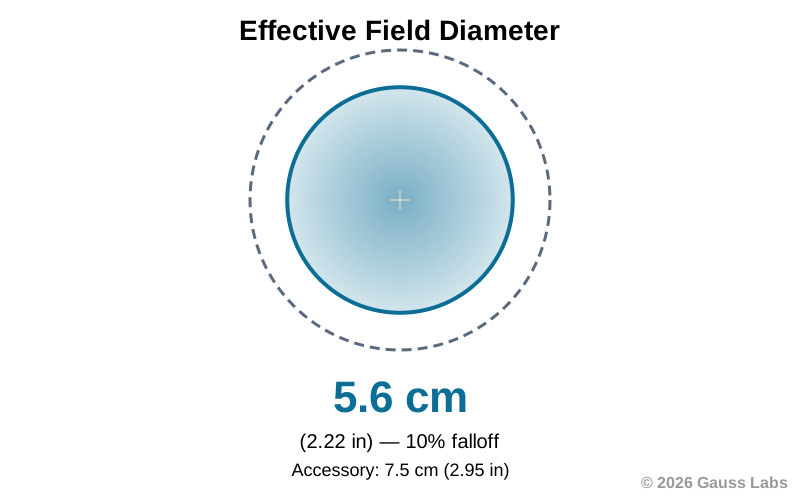
A 56mm span tells you plainly what kind of accessory this is. Its usable field is about two inches across, so you place its strong core on one area rather than draping a wide field over the whole body. The effective field diameter tells you that before you buy, where the single peak value would leave you guessing.
Not every coil peaks at the center.
That center-peaked profile is what a pancake coil makes, the paddle above included, but other coil shapes are strongest somewhere else by design. A donut coil concentrates its field over the ring of wire, so it peaks in a band around the opening and eases off across the middle, a softer center we measure as the on-axis dip. A loop coil carries a broader, flatter field around a wide opening rather than a single tall peak. The two boundaries still describe each of these, but you read them from wherever the field actually peaks, so check where a coil is strongest before you picture its strong core and usable edge.
Both lines mark the field, not the body.
These two boundaries describe the magnetic field we measured in open air, and nothing more. The 10% edge is a reporting convention, a steady place to draw the outer line so every accessory is measured the same way. The field doesn't vanish just past it, and the body doesn't switch on at it, so we don't present these marks as biological cutoffs. There's no evidence that the field has to clear a fixed level such as 5 Gauss to have any effect. They tell you the shape and reach of the field, which is exactly what a spec sheet usually leaves out.
Reading the two together points you to the right accessory.
Taken as a pair, the two boundaries let you picture the field and match it to what you need.
Read the strong core and the usable edge together.
- Use the 50% falloff distance for placement. It's the width of the strong core, so it tells you how large an area gets close to the peak, and how carefully you'd need to center the accessory over the spot.
- Use the effective field diameter for coverage. It's the full width of the usable zone, so it's the honest measure of how much of the body a single placement reaches.
- Match the pair to the job. A wide effective field diameter suits covering a large area, while a compact one suits concentrating on a single spot. Decide which you need first, then read the two boundaries to see which accessory delivers it.
We measure and publish that pair on every accessory we test, from the strong core out to the usable edge. So instead of reading one Gauss value and guessing at everything else, you get the shape of the field laid out in figures you can check.
Want to see a field's boundaries measured, not guessed?
We scan every accessory across its surface and report the strong core and the usable edge together, alongside the peak. If you'd like to see what that looks like, our example reports are open to read.
Schedule a Call See Example ReportsA single Gauss value only marks the very center. Read the two boundaries with it, where the field stays strong and where it fades out, and you can picture the entire field.